(Solved): Tensile Test INTRODUCTION Tensile test is a static, destructive mode of material test used to dete ...
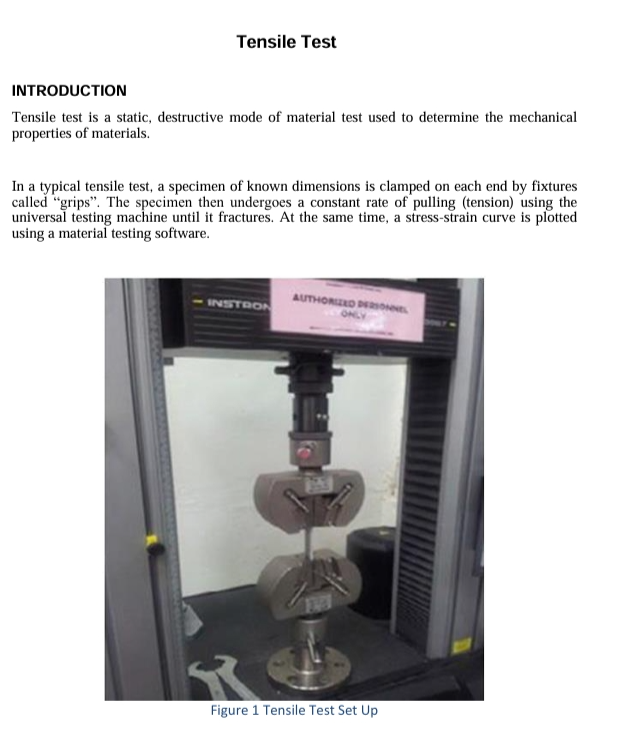
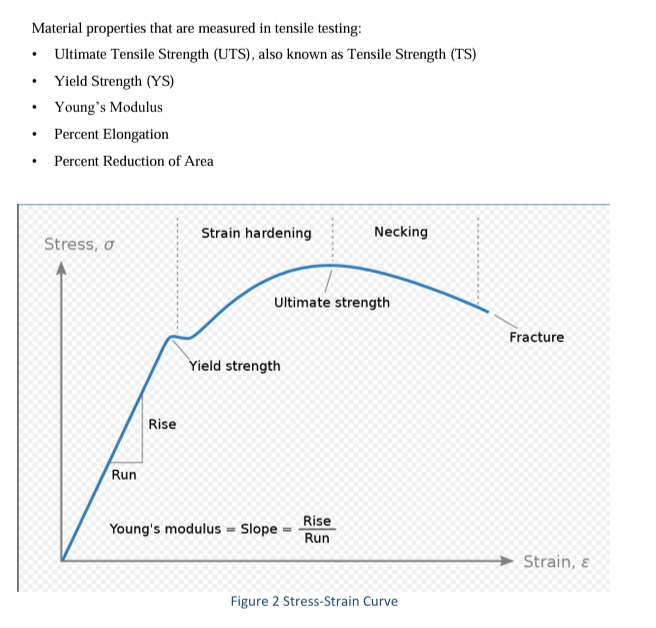
Tensile Test INTRODUCTION Tensile test is a static, destructive mode of material test used to determine the mechanical properties of materials. In a typical tensile test, a specimen of known dimensions is clamped on each end by fixtures called "grips". The specimen then undergoes a constant rate of pulling (tension) using the universal testing machine until it fractures. At the same time, a stress-strain curve is plotted using a material testing software. Figure 1 Tensile Test Set Up Material properties that are measured in tensile testing: Ultimate Tensile Strength (UTS), also known as Tensile Strength (TS) Yield Strength (YS) Young's Modulus Percent Elongation Percent Reduction of Area OBJECTIVES To observe how the material deform under load. To determine the following material properties: i) Ultimate Tensile Strength ii) Yield Strength ii) Young's Modulus iii) Percent elongation iv) Percent reduction in area MATERIALS 6061 Aluminum Test Specimen EQUIPMENT Instron 3369 Universal Testing Machine Bluehill Software Vernier Caliper PROCEDURE Measure the dimensions of the tensile test specimen as follows Turn on the Instron Universal Testing Machine Open the Bluehill Universal Testing Software Open the file for Tensile Testing i.e "CU SMAD" Clamp the ends of the specimen onto the test machine securely. Make sure that the specimen is aligned vertically. In the Bluehill software, go to the "Method" tab Under the "Specimen" Section, go to "Properties" Under the "Specimen Properties", input the following Specimen Label: Your Team Number Under the "Geometry and dimensions", input the parameters as follows Geometry: Rectangular Width: As measured Thickness: As measured Length: As measured Go back to the "Test" tab. Zero Displacement and Force Values. Press "Start" After the specimen fractures, unload the broken pieces from the testing machine Fix both broken pieces together and measure the following parameters: Final Width Final Thickness Final Length Save the following data in a thumb drive for analysis: Tensile graph Tensile raw data in CSV File Press "Finish" Question(1) Experimental Results Present the tensile graph with the features indicated below clearly labelled. Describe your observations of the specimen during the test. Ultimate Tensile Strength Yield Strength Fracture Point Elastic Region words 250 Question(2)Examine the tensile graph and the specimen. Explain the deformation process for each of the following stages Stage 1: Before Yield Strength Stage 2: After Yield Strength, before Ultimate Tensile Strength Stage 3: After Ultimate Tensile Strength until Fracture words 250 Question(3) Compare and discuss the yield point shown in Fig 2 and the yield point shown on the stress. words 200